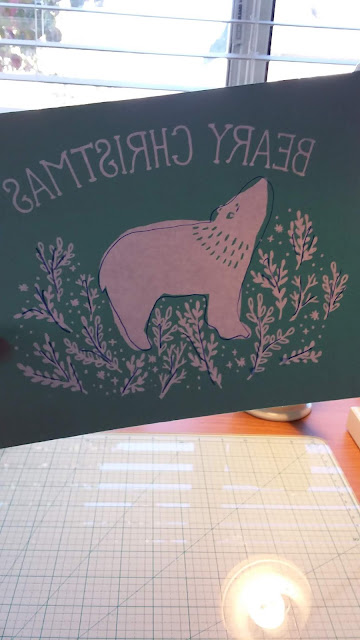
Today, I'm using the Beary Christmas Transfer. It is 8½" x 11" and is the perfect size for the Aiden 9" x 12" frame I will be using. This chalkboard frame came with my starter kit and is really lovely with it's wide frame and antique whitewash.
 |
| I took a marker to the back of the transfer and I will show you why in a bit. |
 |
| Not perfect, but you get the idea! |
 |
| This is the Aiden 9"x12" frame that I got in my starter kit and one of my very first chalking experiences was with the Farm Sweet Farm transfer. I loved how it turned out! |
 |
| I spritzed water over the dried chalk paste to loosen it up for easy removal. Design. Love. Repeat. I have enjoyed this pretty artwork and I am ready to make something new! |
 |
| I let it sit for about 5 minutes to really soak in. |
 |
| I placed half of the backing back onto the transfer. This way, I can line it up better without the risk of sticking where it doesn't belong on the surface or to itself. |
 |
A few extra spritzes and a wet sponge and we are off to cleaning the chalkboard. |
 |
| A few extra spritzes and a wipe with some paper towel cleaned it up nicely! Super easy! |
 |
| See how much easier it is to place the transfer in the frame? |
 |
| Once I was happy with the placement, I gently peeled off the other backing and stuck the transfer to the chalkboard. |
 |
| Now comes the paste! I am using the Bright White chalk paste for the whole project. Nice, simple and clean. I glopped it down in assorted areas and went to work, smoothing the chalk paste over the silkscreen part of the transfer, making sure all the areas were covered. |
 |
| Don't be stingy on the paste. Get lots on there and then scrape off the rest back into the jar. |
 |
 |
 |
| Voila! The chalk paste is on and the excess has been scraped off. I then gently pulled the transfer off (side to side to minimize stretching) and stuck it back to the towel to get cleaned later. |
 |
| Super cute or what! I was glad I did it in all white. Looks sweet and rustic! |
 |
| I decided to do one more project with this transfer, so I cleaned it up with my wet sponge, disinfecting wipes (works awesome at getting the paste off the transfer) and some paper towel. |
 |
| I picked this wooden piece at Walmart a while back. I had already lightly sanded and waxed the surface, so it was all ready to go! |
 |
| Same process - stick the transfer to the surface and smooth out the bubbles, sticking it as close to the surface as possible (the wood grain is a bit uneven, especially with the slats). |
 |
| Squeegee on the chalk paste and scrape off the excess back into the jar. |
 |
| I gently removed the transfer and Beary Christmas it is! |
 |
| Both projects turned out awesome and will be perfect when it comes time to put them out for Christmas! |


No comments:
Post a Comment