Hi, Everyone! It is a hot one here in Oregon! Today is a good day to hunker down in the AC and do some crafts!
This morning I worked on the adorable Enjoy the Journey transfer by Chalk Couture. I am so impressed with how easy the silkscreen stencils and the chalk pastes are to work with, and especially how easy everything is to clean up! I took my time and cleaned each stencil after I used it ~ that gave the paste enough time to dry on the Aiden - Antique white frame chalkboard surface before I continued on. Come check it all out!
I did the first layer in Couture Coral chalk paste and then cleaned up the word transfer. I worked on the bike while the transfer dried. Then I offset the transfer just a bit and used the Buttermilk chalk paste to brighten up the words.
In my excitement to do this transfer, I didn't pay attention to the layering detail. I put down the bike body first, when I should have done the tires first, and then the bike. Oh, well! It still looks cute and I think this will look adorable on the mantle. 💖
"Enjoy the journey as much as the destination."
~ Marshall Sylver
Do some shopping!
Join Chalk Couture!
Tuesday, July 24, 2018
Thursday, July 19, 2018
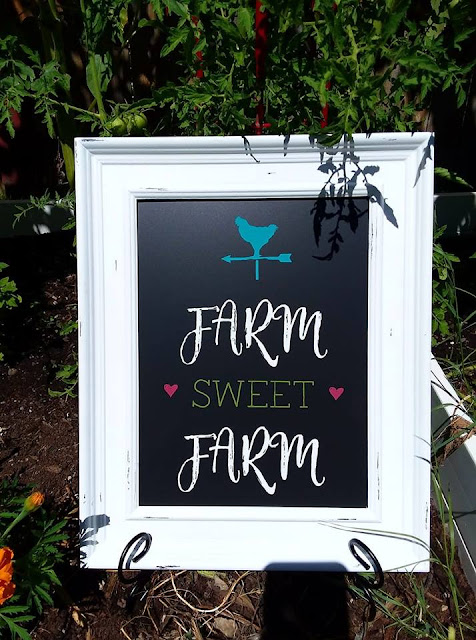
Farm Sweet Farm 🏡
Hi, Everyone! I am loving my new Chalk Couture adventure! So many cute things to make, it's almost overwhelming! Here is my latest creation and I must say, it turned out adorable! I may not be a farmer, but I do have a garden and everything is growing beautifully!
Here's are links to the products I used:
Aiden Antique Frame
Farm Sweet Farm Transfer
Chalk Pastes
Squeegee
Thanks for stopping by!
Let me know if you have any questions about Chalk Couture or it's products, and if you are interested in joining and creating for yourself, click here!
Sam
#chalkcouture
Sunday, July 15, 2018
My First Project!!
Hi, Everyone!! I have completed my first Chalk Couture project and I love it! I was going to do a live Facebook video of it, but I didn't want to torture you for 2 hours (you're welcome!). I thought pictures of everything as I went along would be a better idea. Sorry the pictures aren't the greatest, but you will get the gist of it!
Let's Chalk!!
 |
| Gather everything you need in the beginning. I filled a sheet pan with water to put the transfer(s) in to remove the paste before it dried. |
 |
| Use a marker to mark the back of the transfer. This way you will know where everything goes after you cut it apart and also so that you know to stick the transfer to the other side, which is glossy. |
 |
| Stir the pastes in the beginning. They have a foil seal and it is very messy to take off. |
 |
| Cut all of your pieces apart and put them off to the side. |
 |
| "Fuzz" your transfer. Stick it to a towel and then gently pull it off -- top to bottom or side to side -- This just takes away some of the stickiness of the adhesive. |
 |
| Gently place the transfer to your surface, eyeballing it as close to center as you can. Smooth out any bubbles with your squeegee and make sure it is stuck down. |
 |
| Lesson 1 - Do the big area first. I did the small part first and it dried too quickly and the paste didn't stick to the surface. |
 |
 |
| Put in water right away. The green did stain the transfer a bit, but not to worry, it won't affect the project when you use it again. Use some wipes to help clean up the paint on the transfer. |
 |
| Let it dry before sticking it onto it's backing. |
 |
| See, there's my boo-boo. Darn fingers! Like I said, have a couple Q-Tips on hand to take care of those. |
 |
| Let it dry between additional transfers and carry on! |
 |
| I just used my finger to put paste on the tiny transfers, but I think I will get another squeegee and cut it in half for the thin areas. |
 |
| After everything had dried, I put the first transfer back on to get the "Est" on there. |
 |
Thanks for stopping by!
If you have any questions about Chalk Couture, just let me know!
Sam
Wednesday, July 4, 2018
Happy 4th of July Ribbon Flag
Happy 4th of July!!
Here is an easy and fun flag to make ~ red, white and blue assorted ribbon and a dowel. Looks adorable on my front door!
I hope everyone has a fun and safe day, and I am looking forward to the fireworks!!
Sammy
Here is an easy and fun flag to make ~ red, white and blue assorted ribbon and a dowel. Looks adorable on my front door!
I hope everyone has a fun and safe day, and I am looking forward to the fireworks!!
Sammy
Subscribe to:
Comments (Atom)


