Pages

Wednesday, October 17, 2018

Beary Christmas

Hi, All!  It is a lovely and warm October afternoon here in the Willamette Valley ~ it's 74°F out there and sunny.  Emma (my sweet Puggie) is finishing her nap in the family room, so I figured I'd hang out in the craft room and work on some Chalk Couture projects!

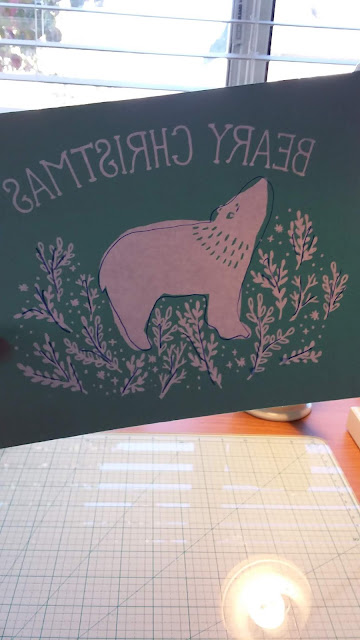
Today, I'm using the Beary Christmas Transfer.  It is 8½" x 11" and is the perfect size for the Aiden 9" x 12" frame I will be using.  This chalkboard frame came with my starter kit and is really lovely with it's wide frame and antique whitewash.  


Let's Chalk!


I took a marker to the back of the transfer and I will show you why in a bit.

Not perfect, but you get the idea!

This is the Aiden 9"x12" frame that I got in my starter kit and one of my very first chalking experiences was with the Farm Sweet Farm transfer.  I loved how it turned out!

I spritzed water over the dried chalk paste to loosen it up for easy removal.  Design.  Love.  Repeat.  I have enjoyed this pretty artwork and I am ready to make something new!

I let it sit for about 5 minutes to really soak in.

In the meantime, I peeled the Beary Christmas Transfer from it's backing and stuck it to a towel to "fuzz" it.  Fuzzing just adds a bit of fuzz to the back of the transfer to take down the tackiness of the adhesive so that the transfer can be removed from the surface you are working on without being too stuck on, also minimizing stretching and warping the transfer.

Okay, the reason I drew on the transfer backing was to make sure that I stuck the transfer back onto the glossy side of the backing.  Otherwise, it would just stick to the paper and would be a pain to remove.  I cut the backing in half also to help me guide the transfer onto the chalkboard surface.

I placed half of the backing back onto the transfer.  This way, I can line it up better without the risk of sticking where it doesn't belong on the surface or to itself.


 A few extra spritzes and a wet sponge and we are off to cleaning the chalkboard. 


A few extra spritzes and a wipe with some paper towel cleaned it up nicely!  Super easy!

See how much easier it is to place the transfer in the frame?

Once I was happy with the placement, I gently peeled off the other backing and stuck the transfer to the chalkboard.

Now comes the paste!  I am using the Bright White chalk paste for the whole project.  Nice, simple and clean.  I glopped it down in assorted areas and went to work, smoothing the chalk paste over the silkscreen part of the transfer, making sure all the areas were covered.

Don't be stingy on the paste.  Get lots on there and then scrape off the rest back into the jar.


Voila!  The chalk paste is on and the excess has been scraped off.  I then gently pulled the transfer off (side to side to minimize stretching) and stuck it back to the towel to get cleaned later.

Super cute or what!  I was glad I did it in all white.  Looks sweet and rustic!

I decided to do one more project with this transfer, so I cleaned it up with my wet sponge, disinfecting wipes (works awesome at getting the paste off the transfer) and some paper towel.

I picked this wooden piece at Walmart a while back.  I had already lightly sanded and waxed the surface, so it was all ready to go!

Same process - stick the transfer to the surface and smooth out the bubbles, sticking it as close to the surface as possible (the wood grain is a bit uneven, especially with the slats).

Squeegee on the chalk paste and scrape off the excess back into the jar.


I gently removed the transfer and Beary Christmas it is!

I cleaned up the transfer in some water and cleaning wipes and left it to dry on the towel.  I'll get about another 8 uses out of this transfer, so after it's dry, I will put the backings back on and into the binder it goes for another project!


Both projects turned out awesome and will be perfect when it comes time to put them out for Christmas!

Thanks for stopping by!  If you have any questions about Chalk Couture or it's products, or need more information about joining and becoming a Chalk Couture consultant, drop me a note and I will be happy to answer them for you!


Thursday, September 20, 2018

Rustic Wreath and Harvest

Phew!! 

This one took me a couple hours to finish, but I absolutely love it! 

This chalk board is the Aiden 18" x 24", so it is nice and big and will look awesome over the fireplace!  I used the Rustic Wreath and Harvest transfers.  The wreath transfer is really fiddle-farty because it is so HUGE ~ I could have used an extra set of hands and I find that the larger the transfer, the more it sticks. And, it kept folding up on itself on the sticky side while I was cleaning it and was a pain in the butt to unstick.  The trick is to use cold water when rinsing and pulling it apart gently from itself.  The transfer stretched a tiny bit, but will be just fine future projects!  So, next time I try a large transfer, I will try prepping the board with chalk to take down the tackiness of the transfer. I am really loving the teal color accenting the oranges and browns.


Thanks for stopping by!  If you would like more information about Chalk Couture and it's products, just drop me a note!

Sam


Wednesday, September 12, 2018

Gather here with thankful hearts

Happy almost Fall, Everyone!  The rains have come and the air smells wonderful!  It's almost time to get out all of the fall decorations and pumpkinize the house! 

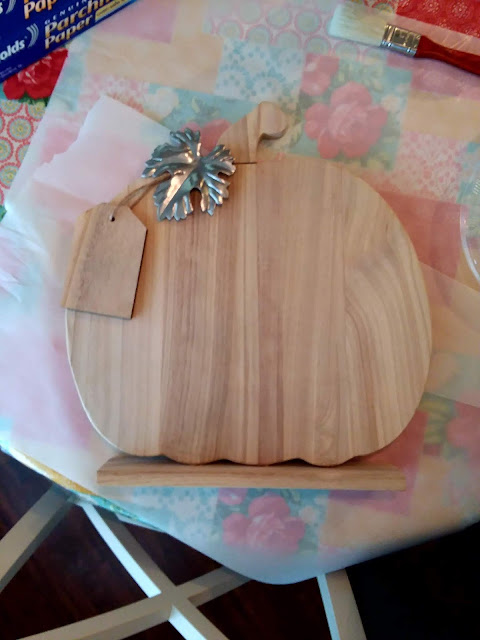
My project for today turned out wonderful!  I found this adorable pumpkin wood shape at Joann's on sale and knew it would be perfect for the "Gather here with grateful hearts" Chalk Couture transfer.  I will add links to the transfer and the chalk pastes used at the end of the post.


Now how cute is this!  I removed the tag and moved the tin leaf out of the way and applied a wash of chalk paint in a dark gray color.  After it was dry, I added a whitewash over top, allowing some of the gray to show through.  Once dried, I coated the pumpkin with a clear wax, which nicely blended the chalk paint together too!

I love how it turned out!  The pumpkin is quite large, about 15" wide x 15" tall and the transfer fit perfectly!

I used the floral elements to frame the phrase.

I think I will wrap the bottom and top with some fall colored rice lights to really let it shine on the table.


Thanks for stopping by and if you are interested in learning more about Chalk Couture and it's products, drop me a note!

Sam

Shopping List:

"Gather here with thankful hearts" Transfer

Pumpkin Pie Chalk Paste
Buttermilk Chalk Paste
Garden Herb Chalk Paste
Orange Peel Chalk Paste


https://www.chalkcouture.com/samanthaburns

Tuesday, August 28, 2018

Bon Appetit ~ Again!

Hey, Everyone!  I was at Walmart the other day and came across these cute wooden signs for about $10 each.  I grabbed a few different sizes; one was a rectangle 10" x 12" and the others were 12" x 12", each in different finishes.  Some were stained dark and others had a white wash finish to them.  I sanded them down and put a coat of wax on top (I just used the Waverly Wax Coat found in the craft section with the chalk paint).  Doing this helps the Chalk Couture transfer adhere to the surface.  I decided to use my Bon Appetit transfer again.  That's the nice thing about these silkscreen stencils ~ with good care and cleaning, they can be reused up to 8 times.  Perfect if you are planning on using them for a sign decor business!  Vinyl stencils that can be made with a Cricut or Silhouette can only be used once and you have to cut a new one out, weed the excess and add transfer tape for each project.  This is sooooo much easier!

Anyway, here is my masterpiece for today!


I am going to coat this lovely masterpiece with some varnish and hang it on the pantry cupboard in the kitchen.

Thanks for stopping by!  Please check out all the lovely transfers, chalk pastes, inks and surfaces in my store and if you would like more information about joining, drop me a note! 

Sam 🌸


Join Chalk Couture: Become a Designer!

Come hang out with us on Facebook:  EBChalkCouture


Thursday, August 16, 2018

Pumpkin Patch Truck

Hey, Everyone!  I don't know about you, but I am totally ready for Fall to get here!  I am not loving the heat and with all of the forest fires going on in BC, Washington, Idaho and California, the wind has shifted a lot of the smoke to the Willamette Valley here in Oregon.  I am very thankful to have air conditioning and lots of projects to keep me busy in the house!

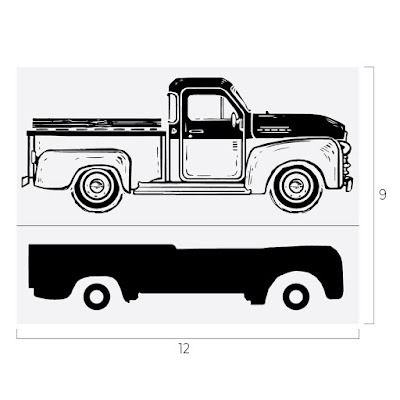
For today's Chalk Couture project, I am using the Vintage Truck and Fall Add-on transfers on an Aiden Antique White 12" x 18" Chalkboard.  

Let's Chalk!


Here's the layout I chose.  I love everything pumpkin, so that's what I went with.  The set also includes transfers for corn, apples, and hay bale themes.  This transfer is very versitile!

I placed the bottom body of the truck first and used the Couture Teal chalk paste for the body color of the truck.


I used Orange Peel chalk paste for the pumpkin patch piece.  I love the texture on the words!

I unintentionally applied a thick layer of paste to the truck body and was taking a while to dry, so I grabbed the blow dryer and sped up the process!

Next came the arrow and the truck itself.  I had heard a few misgivings about this transfer and that it peeled up some of the chalk paste from the bottom layer.  I made sure I laid it gently on the surface and didn't apply extra pressure to the transfer.  My white chalk paste was a little thick and I should have thinned it out a bit with some water.  The truck turned out perfect and the transfer did not ruin the teal body of the truck!


Next came the pumpkins.  So cute!!

I used the blow dryer again to help the pumpkins dry faster so that I could add the stems.


After I added the stems, I decided to use the truck transfer again and use a brown chalk paste on the wood looking bed of the truck.  In hindsight, I wish that I didn't.  I liked it better with the white.  Oh, well ~ next time!  That's the nice thing about these transfers; they are reuseable up to about 10 times, so you will get LOTS of projects out of them!

Super cute!!

Love the texture on the words!

I think it turned out awesome and any little bits of finger and chalk marks were easily wiped away with a damp cloth.  I love it!  This is definitely mantle worthy!

Thanks for stopping by!  More Fall projects to come!